Home About Meet Contact

Tuesday, March 12, 2013

Getting to Know You: Balancing

Happy Tuesday everyone! Id like to say a big welcome to our new followers from the GFC Collective we co-hosted and any new followers from elsewhere. And hello to everyone! One thing we like to do here at B.You is get to know our readers. Because we offer tips and tutorials to help out anyone stopping by based on our experiences and what works for us we want to make sure we don't forget about your needs, too. 

This week we are all struggling a little bit in finding the perfect balance between life and blogging. Myself in particular, I took the week off from Chevron Stitches and A Fox & A Wolf so I could focus on some trying issues going on with my daughter and bullying at school. Usually I am able to spend my late nights catching up or scheduling blogging, but lately I've been spending that time making a plan of action to help her out when the school just isn't. So I seem to be missing that 'balance'. 

We want to know: How do you find that balance with life and blogging? Do you take 'days off' from blogging? Do you only blog certain days and schedule your posts? What works for you? 

You can leave us a comment or send us an email at b.you.blog {at} gmail {dot} com. We will be featuring some answers in a post later on so that we can cover as many aspects of this balancing act as possible. Thank you all for your feedback! 


Pin It

Monday, March 11, 2013

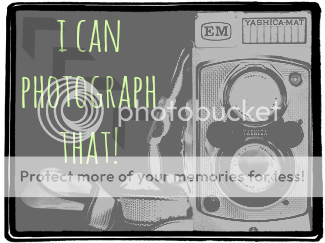
I Can Photograph That: Part 1 | Choosing A Camera

Many bloggers either own a camera or are in the market for one. Cell phones are great don't get me wrong, but a DSLR or Point N' Shoot does so much more; you have more control and can deliver better quality images. To be well rounded, having a cell & a real camera can take your blog from moderate to amazing!

As a photographer I get asked this question ALL THE TIME! "What kind of camera should I get?" Now I don't necessarily have the right answer for that question but I can say (no matter what kind of camera you are looking for) do enough research before you buy; read online, check out forums, ask friends, ask dealers, use the cameras (try out) if possible, ask about sales and warranties, ask about accessories...the whole nine yards! 
Before you dive into the swing of things or even take a look at a camera ask yourself these questions:*
___
1. What do you need the camera for? (Examples: Product, Lifestyle, Daily Life, Personal,  Street Photography, etc)
2. What is your budget?
3. What conditions will you be shooting in (Indoor, outdoor, in water, low light,etc)?
4. Will you just use the auto function or are you willing to go for pro(meaning learn more)?
5. Any experience?
6. What features do you want? (zoom, image stabilization, touch screen, interchangeable lenses, etc)?
*helpful hint: when shopping for the camera, ask the dealer his opinions. have him help you compare cameras.

Here are some things to consider:

Megapixels - I mean, what are they even for? I just want a camera! Well to be honest, maybe 10 years ago the word megapixel would have been a major concern when buying a digital camera but nowadays most cameras are well equipped with over 6 megapixels. If you are worried about megapixels, the main worry should be when printing. If you are printing larger than normal size (over 8x10) make sure your camera has over 10 megapixels. For online use, blogging and personal life all cameras that are on the market right now will have enough pixels to suit your needs.

Accessories - If you haven't owned a camera before be aware of what you need! Most cameras have accessories which can be as simple as a bag. Keep that in mind when shopping on a budget. I highly recommend a sturdy case for your camera. Other accessories include: flash equipment (lighting), other lenses, memory cards, tripod/stands, backgrounds, straps, spare batteries, amongst other things. A memory card of course is always needed & I recommend no less than 4GB.

DSRL or PointNShoot - Keep in mind when shopping, what type of camera you want to lug around. DSLRs are larger and heavier and require more accessories (lenses, flashes, etc). They usually are body only, or with a simple beginner kit, which means a bag, lens, some cleaning accessories, maybe an extra battery, a memory card...anyway kits vary. The kit lens is great to learn on, but I recommend researching at least two other lenses you can buy in the future (depending on what you are shooting). Point N' Shoots are great because of how portable they are. Some can even go in your front pocket!

DSLRs are of course, more cash(mostly).

Zoom - You may see the words "optical and digital zoom." These are important. Stay away from fancy high digital zoom. That only means it is enlarging the pixels in your shot; yes it does make your subject closer/bigger but also more pixelated (like if were looking at a mosaic piece or too close to your television). Optical zoom is key, 3x or larger is what most modern cameras have.

Like I said above, read reviews and ask questions. It is very important you don't miss anything especially since most of the nice digital cameras are in the hundred(s) dollar range. Personally, I would check online forums and photography sites before asking an employee at a store. Sometimes that employee is just an employee. If there is a local camera shop in town, go visit and have them pick out a few cameras, ask if you can touch them, and use them around the store. Check out their features, is it comfortable to hold, and you can even see some accessories right there instead of waiting.

Once you like a camera or a few, compare. Ask the pros and cons. And then most important, find the best price. Rather it be online or at a store, there is usually a good deal somewhere. Don't be afraid to buy used, just be careful. My first DSLR was used.

Are you in the market for a camera? Do you have any questions? Leave a comment below!

Pin It

Sunday, March 10, 2013

The GFC Collective


Welcome to the weekly "GFC Collective" party :) This is a link up for bloggers who want to gain followers and meet some awesome new bloggy buddies. I have met some pretty neat people by following them with GFC. It's so easy to keep up to date with all of my fav blogs :)

Not sure if this is the blog hop for you? Listen to what other bloggers have to say...

"Just to let you know, your blog hop is the best I've participated in for gaining new friends!!! I couldn't believe the results!! Thank you!"
- Danavee, This Vintage Grove

"I'm dropping by to let you know that I love being a part of your blog hop! 
 I have been meeting really nice bloggers.  Bloggers who are actually friendly and want to connect! 
I'm putting the blog hop button on my side bar, like, permanently!  Everyone should know about it. 
 Just thought I'd share with you. Thank you."
-Vickie, Oh Abby Day


"Hi BreAnna, just want to say that your blog is beautiful, creative, and fun. The GFC collective is one of my favorite parts of the blogging week. Love meeting new friends and fellow bloggers. We just started our blog and were amazed at how helpful the GFC collective is! Keep up the amazing work."
-Alea and Rachael, Sparkle Your Life


"This GFC Collective Hop is seriously one of the best link ups out there! Through this hop I have found so many great blogs & friends that I wouldn't have otherwise found! Thank you so much for hosting such a fun link up! Please take the time to link up & join along! You won't be sorry that you did!"
-Amy @ Keepin' Up With the Smith's

Has the GFC Collective done wonders for your following? Let me know, shoot me an email at peacoatsnplaid(at)gmail(dot)com


Autumn @ The Busy Bee

and our lovely co-hosts for the week

Erica @ To The Sea
Heidi & Ashley @ B.You Blog

...want to co-host? Email Bre at peacoatsnplaid(at)gmail(dot)com


Pin It

Friday, March 8, 2013

How To: Make a Blog Picture Watermark using Photoshop

Watermarking. We've all heard of it- we've even seen it on our beloved bloggers' pictures- but how do they do it?? It's got to be easy, right?

Well it is. 

In these following steps, I am going to show you how to make a basic watermark for all of your blog pictures, using Photoshop (my editing photo program of choice). These steps are for a text-based watermark! Believe me, it looks daunting, but it's rather easy! I promise!!! 

Seriously, if I can do this, ANYONE can. Totes.

1.

Like I stated earlier, we'll be using the Photoshop editing program for this How-To :)

So, open your photoshop program and open a new Document:

File > New

I generally like to start on the bigger side of things, always. It is so much easier to shrink something to the size you need rather than try and blow it up. Once saved small, anything blown up will pixelate and look grainy. So, save big, edit to a smaller size if needed- always.

When creating new watermarks (or any other brush for that matter) I like to open a new Document at 1000x1000 pixels wide. Hit "OK" once done.

2.

Once your new Document is opened, we can begin creating your fancy new text-based watermark!

  1. First, select the "Type" tool on the left hand tool bar. 
  2. On the top you'll see your "font" box- by clicking that arrow, a menu will drop down and you can scroll through until you find a font you like best!
  3. Once you found the font you like, click it!
3.


Next we will need to change the font color- I recommend using white or black to begin with- I usually choose black.
  1. On the left hand tool bar click the "Foreground Color Box". A new window will show up.
  2. Drag your cursor to your color- again I suggest starting with white or (my preference) black!
  3. When color is chosen, click "OK".
4.


Next we will need to pick a font size- I generally like to begin with an 8-10pt font size. We will resize this later.

Just click the menu at the top and find the font size you're comfy with.

5.

Now, in your white Document box, click your cursor somewhere on the left hand side. Make sure that "Type" tool on the left hand menu bar is still clicked.

Start typing your desired watermark text. I'm just going to simply do my blog name- Sweet Lavender Bake Shoppe :)

6.

Once finished, click on the "layer 1" box on the right menu to set your text. The box should be highlighted.

7.

Now we will need to resize that text!

  1. With your watermark's layer box highlighted (clicked and set) press buttons "command" and "t" at the same time, on your keyboard. If you're using a PC, you'll press buttons "ctrl" and "t". This will create a box around your text for easy resizing (and moving). You can let go of keyboard buttons now :)
  2. Again on the keyboard, press and hold the "shift" button. While holing that shift button, drag your cursor to the corner of your box and drag out as far as you can go in your white document. When done, let go of mouse cursor and then "shift". By holding the "shift" button, you can resize your picture/text at an equal proportion. If you do not hold "shift" your text/picture can resize disproportionately. If at any time you mess up, just hit "command" and "z" at the same time (ctrl and z for PC) and it will take you back one step. 
  3. Hit enter when sized to your liking. This sets it.
8.


Now we are going to crop our text and get rid of all that extra space.

  1. On the left hand menu, click the "crop" tool. 
  2. Starting at one corner of your text, drag a box around your text, as close to the actual words as possible, without cutting anything off. You can also bring the sides in manually once this box is created OR push them out a bit if you got too close.
  3. When ready, hit "enter" on your keyboard.
Again, remember- if at ANY time you mess up a step- simply hit "command" and "z" on your keyboard at the same time. This will bring you back one step/undo last step :) 

9.


Once cropped, on the top menus, go to:

Select > All

This will select everything you've cropped in your new box/the entire image.

10.

Next, again on those top menus, go to:

Edit > Define Brush Preset

This creates your brush which will become your new text watermark!

11.

A window will pop up asking you to name your new brush. Go ahead and do so :) Hit "OK" when done.

Your watermark brush is now created!

12.

Now for the fun stuff! How to actually use your watermark!

Upload your photo to Photoshop.

  1. Then on the left hand menu bar click on the "brush" tool.
  2. Next, on the right hand side there will be another little menu, click on "brush". 
  3. Scroll through all the possible brushes you can use for future projects ;) until you find your created watermark brush. Look closely! Once found, click it! 
13.

Now...
  1. At the bottom right you'll need to click that "create new layer" button again. By doing this you'll make sure you are creating/editing/having fun with only your watermark created.
  2. Make sure your new layer is highlighted, if it's not- click it. 
14.


Now "stamp" your watermark wherever you'd like! I stamped mine at the bottom left hand corner- it's hard to see because it's black. 

We'll need to change this watermark to another lighter color for this particular picture. Where I wanted my watermark to be, the picture had a lot of dark colors- so black won't work. Remember- because my "foreground color" box shows black, when I "stamp" my watermark it is going to show up black.

With watermark layer still highlighted, go to:

Image > Adjustments > Hue/Saturation

15.


 A window will show up allowing you to change that watermark color!
  1. Play around with those 3 arrows! By moving them left and right you'll see you can choose from a variety of colors! For my watermark, I simply want white. To do so just move that bottom arrow all the way to the right- or until it says "+100".
  2. Viola!
16.


Remember, if you need to move your watermark around, or resize it you can do so by simply pressing "command" and "t" at the same time on your keyboard when your watermark layer is highlighted. Holding "shift" and dragging any corner allows you to resize it, and clicking in the center of your box and dragging around allows you to move it around!

When done, hit "enter"on your keyboard.

Neat right?! 

Once you get this technique down, make sure you play around! There are so many lovely things you can discover, like making a multiple font watermark or image watermark. This is also a great way to make a custom brush for arrows, little banners, fun shapes, etc.

If you have an image you like, you can skip to steps 9 on and basically make the same thing. Just make sure your background of your image is transparent. Making one from scratch on Photoshop will do that for ya!

Got questions? Need help? We're here to help! Just email us and we'll get you back on track in no time!
Pin It

Thursday, March 7, 2013

Blog Tips: Promoting Your Blog by Joining Blog Hops


  Promoting your blog is one of the best things you can do to attract followers. There are so many ways to do so, a lot of which we have already covered. One in particular is joining Blog Hops. Blog Hops (or Link Ups) are a blog link up hosted by one or many bloggers and is usually set on a certain day of each week, where other bloggers can come link up their blog with the chance of other bloggers hopping back to their site. A pretty simple concept to get your blog noticed by others, and it's basically like free advertising every week.

Rules
 Each Hop host might have a certain set of guidelines that need to be followed, which are pretty easy to follow through with. Most will have you Tweet out about the hop, away to attract other bloggers to come join in. They will also ask you to make sure you follow all the Hosts and/or Co-Hosts involved with that particular link, kind of like a "thank you" for hosting. And of course, what is a hop with out going to check out the others who have linked up. Some of these hops can attract HUNDREDS lovely bloggers to link up, some of which my stop by blog as well. So be sure to check out others, even leave a friendly comment letting them know you found them through "such and such blog hop" and you are stopping by to say hello. (Please don't ask for a return follow; I think we have covered that one already). Pretty simple rules. Some might ask for more or less, each hop is different and unique in itself.

Types of Hops
 If you have never joined a hop before, you might be asking yourself "Is a blog hop right for my blog??" The answer is yes! There are different types of hops out there, all pertaining to different aspects of blogging! So might be for your blog while others not. The best part is, there are so many to choose from.

GFC Hops: These hops are geared towards Blogger blogs that have GFC followers (Google Friend Connect). They are open to all blogs that use GFC (mainly those through Blogger). Here are a couple examples to check out:

DIY/Creative/Craft &/or Food Hops: If you do a lot of DIY/Crafts or share recipes, then these hops are for you. Not only is it a great way to promote your blog, but also a great way to feature your latest project on your blog. These hops with ask you to link up a specific post from your blog, not a direct link to your blog. Here are some examples:

Fashion/Style Hops: If you share those "What I Wore" outfit posts, then these hops are right up your alley. The blogs that host these hops with host them once a week. They will show you their outfit(s) for the week and then will invite you to link up you outfit post as well. Here are some:

Social Media Blog Hops: These hops are not only for your blog, but for social media too. They will have you not only hop to the linked up bloggers blog, but also whatever social outlet they have linked up as well. Examples:

Misc. Hops/Link Ups: These hops fall under various categories. They will have you link up a heart-felt post, things that are on your mind, VLOGS, etc.
Examples:


That's just a short list of the different types of hops or link ups out there. There are hundreds that go on through out the week.

 The hosts of these hops and link up also like a little recognition on your blog as well. Whether it be linking back to their blog in your particular post, putting up a their button up some where on your side bar, or you can create a separate page (so your side bar doesn't get cluttered) and put all the Hops and Link Ups you join on that special page and label in "Linky Party" "Link Ups" or "Blog Hops" just so those that want to see what link ups you join every week can see the list of them.

 Now that you are hopping, you might even have the urge to start your own Blog Hop. GO YOU!! It's a great way to meet new bloggers and for long lasting blog friendships!!

 Do you have a Blog Hop or Link Up that you either Host or Join that wasn't mentioned?? Leave us the name and link of it in the comments below.


Pin It

Wednesday, March 6, 2013

Blog Tips: Promote Your Posts


Writing a blog post usually doesn't take 10 minutes and then you're done, ready to publish. Typically you spend hours writing it up, finding or making graphics, uploading and positioning photos. Sometimes a post develops over a couple of days. So when you hit publish, you want to make sure that you're getting the most out of your blog post - the most out of all that work - by promoting it as much as you can. I'll show you a few ways to do that to gain maximum exposure. 

Tagging - You want to make sure that before you even publish your post that you have tagged it appropriately. Take key words from your post, title, and subject and use them as tags. One word tags are best, as they keep it general and not too specific. The more specific you get the harder it is for your post to come up later. Most blogging platforms let you search for blog posts related to specific tags, which opens your posts to the entire blogging community. Not just that, but tags allow your posts to get exposure in Google searches. The more popular your posts get, the higher up on the search list they become. This is the biggest and best way to promote your posts.

Google+ - The first thing you're going to want to do after you hit publish {if you have Blogger and it  prompts automatically} is to share it with your Google+ peeps. When I hit publish on any of the blogs I write, a little box will pop up with a comment form for me to write a brief description of my post and who I want to share it with on Google+. I just fill that out and hit share. The people in my circles will get a notification that I shared a post with them and they'll go and check it out. If you have Blogger and that little box doesn't automatically pop up, head on over to your posts section and underneath the post you just wrote click 'share' and that box will pop up. What's great about sharing on Google+ is that Blogger makes it very easy for you to spread your posts to the people in your circle. It's almost effortless because there is no copying and pasting links. If you don't have Blogger, but are on Google+, simply head on over to your Google+ profile and share the post on your 'wall'. Everyone in your circle will see your update and will check out your post. 

Twitter - Once you've shared on Google+, you're going to want to share with your Twitter friends too. The best way to do this is to head on over to your posts and underneath the one you just wrote click 'view' and a new tab will open with that post. Scroll down to the bottom of the post and click on the Twitter share button. It will automatically share your post title with the link without you having to copy and paste anything. We like effortless, don't we? If you don't have that option of sharing at the bottom of each post, simply log in to Twitter and paste the link URL and share. If your Tweets are automatically shared on your Facebook wall, then great! One less step for you to promote your post.

Facebook - You can share on either your personal Facebook wall to let all your friends know about this awesome recipe you just put together or if you have a Facebook page for your blog, share it there. Or you can share on both accounts. My posts are promoted on both my personal and my blogs' pages so that my posts get maximum exposure. Your friends might get a little tired of seeing it on your personal page, but hey; they're your friends! They should support you, right? 

Pinterest - If your posts consist of images and/or graphics at least half of the time, you should create a board for your blog on Pinterest. We have one for B.You {a group board} that we each pin to that gets a lot of exposure. What is great about Pinterest and promoting your posts on it is that your pinned image for your post can get seen by not just the people following you, but by the entire Pinterest public as well with two ways; repins and your descriptions. Lets say you write a blog post about a recipe for a crock pot apple pie {does this exist, cause if it does I am soooo making it!}. You write up the post and include a photo graphic to pin and pin it to your blog board. In the pins description you write 'B.You: Easy Crock Pot Apple Pie Recipe'. Someone hops on Pinterest and searches either 'easy crock pot recipes' or easy apple pie recipes'; your pin will come up. People will check it out, love it and repin it. The more repins it gets, the more popular it becomes and the more exposure it will get. And chances are that if someone has taken the step to visit your pin, they're going to check out the rest of your blog too. 

Instagram - So, remember that awesome post you wrote about an easy crock pot apple pie recipe? Take that photo graphic and share it on Instagram. Write a comment saying something like 'Shared this easy apple pie crockpot recipe today on the blog! Check it out! (Link in profile) #crockpotrecipe #applepierecipe #food #byou #foodblog #desserts'... you get the picture. Your friends are going to see it, they're going to want to check it out, maybe even share it and recommend it to their friends. And all those hashtags you used? People who don't follow you will find your photo, like it, then head on over to your blog post to check it out. I've gained a lot of followers and views on Chevron Stitches just by using hashtags in my photos. It's like 'tagging' on your blog posts, but for pictures. 

Digg, Delicious, and Reddit - These bookmarking sites are great to promote your posts on because like Google search, your posts becomes open to the public searching for related posts. Submit each post and you will start seeing your traffic pick up within just a few days. 

Contacts - Belong to a group on Facebook that is a community of bloggers and networkers? Share your post on the wall. Have a list of blog contacts? Send out an email with your latest blog post to them and ask them what they think. Add your latest blog post to the signature of your email. Are a part of a blogging community like the Better Blogger Network or Networked Blogs or Blog Catalog? Share your post with your friends or exchange links with other bloggers. 

Other Blogs - Maybe you have a chance to guest post on another blog; share a post from your blog on theirs linking back to your blog. Another way to promote with other blogs is by commenting on relevant blog posts linking back to your post. Remember to keep it genuine and authentic - that blogger isn't going to want to visit your blog if you sound fake. 

Other Websites - There are websites out there that will allow you to submit your blog for their visitors to see. Amazon, IFITT, Alltop, Syndic8, and Demand Studios are examples of websites that allow submissions of blogs and posts to be distributed and shared with other websites. Amazon will even pay you if someone reads what you have submitted through their Kindle Vendor section! I highly recommend visiting these sites and checking them out as a way to promote your posts. You could also search for 'syndicate websites for bloggers' and a whole list will come up with other websites to submit your blogs on. Remember to also visit those blog network sites to gain a following like the ones mentioned above in the contacts section as well as Bloglovin'!

It might seem like a lot and incredibly overwhelming, but you don't have to utilize every single option here. More than half of these options have scheduling posts, updates, etc available which will give you more time to brainstorm more posts! 

Check back soon as we will share with you how to schedule posts, updates and more or multiple social media websites! 


Pin It

Tuesday, March 5, 2013

Be Your Own Blog


When Heidi and I talked about this concept and started getting the project rolling with the blog, our main focus was to have a blog that not only helped with blogging in general, but to be original when blogging. That is essentially what B.You is all about {take a look at our URL!}; to be your own blog. We are very passionate about being an original blogger and not a copy cat for many reasons. And because we are so passionate about it, creating this blog for that very reason, I thought I would share some of those reasons. Here are some guidelines to be your own blog and not a copycat.

Authenticity. Chances are that if you're a blogger, you want to have a blog that people want to read. And if you want people to read it you want to be trusted. If they come across your site and see the same thing that someone else just posted a few days prior, they're not going to stick around. Why? It's not authentic. Blogging is a rad community of girls {and guys} that support one another, but you will not be supported if you're not authentic and are a copy cat. Actually, I was following a blog that had content I genuinely liked to read... until it was brought to my attention that this particular blogger was ripping off a few of our posts. I headed over to her blog and yes; her content was just about the same as what we had posted in three different categories just a day or so before. No hard feelings or anything, however; I did stop personally following that blog because the content wasn't authentic. If what you're writing about isn't original and isn't you, your readers will soon catch on and then what you set out to blog for isn't there anymore; readers. 

Making it your own. There will be things out there that you will blog about that has been covered by other bloggers. I'm sure even as I write this post there is another article out there similar in topic. Maybe you've found inspiration in a post you saw, or want to complete a project from Pinterest and would like to blog about it. As long as at least 60% of your content is authentic and original you are in the clear. However, with that said, how do you manage that other 40%? By making it your own. Take your outfit of the day inspired by another fashion blogger and switch up the accessories, handbag, or shoes; change the backdrop for your photo; style your makeup differently. Write about why you love that particular outfit so much. Or if you found a really cool dreamcatcher to make from Pinterest and you want to write a tutorial for your readers, make it your own. Change up the size, colors, beads, etc. Photograph it differently. Even if the materials are the same, you've made the project your own in all other aspects and therefore it is your post, not theirs. By making a post that is the same topic as something else that's been covered your own, you've managed to stay true to yourself, stay authentic, and keep your readers. Let's face it; we cannot avoid wanting to blog about the same things. So be sure to make it your own.

Design. There are about 5 blogs I can think of right off the bat that I would love to steal their design. Seriously! I won't, but I love them so much and wish I had thought of that. There's nothing wrong with finding inspiration in those blog designs, though. The best way to avoid not copying a design is to just not copy it. Aside from that, you're guaranteed to not copy a blog design if you hire a designer. They will ask for blog inspirations, but will take elements from them to make it your own {along with the other 100 questions they ask you, too!}. If you're designing your own blog, take the same lead and just draw inspiration from rather than copying exactly. Especially, and I cannot stress this enough, especially if the design or design elements are their own. I purchased a clip art set from Ink Nest called 'Blog Elements'. I am pretty positive that I am not the only one who purchased this set. I bought it to use for the design of my personal blog A Fox & A Wolf, but I made what I purchased my own. Yes, someone might have the same graphic as me in their header too, but my fonts are more than likely different, the placement is probably different and all of the other little elements I used are used differently; I made it my own. So mine may be similar to another bloggers design because of the purchased elements, but it is not a copy cat. Much like your content, you want your design to represent you and be authentic.

Connecting. Like mentioned above, blogging is a community. Who want's to be a part of a community of fakes and copycats? No one? If you're authentic in your personal connections with other bloggers, you'll be able to build lasting blogging friendships, which will build this blogging community even more. But more than that, your friendships with those bloggers will benefit you as well. When you're you, bloggers will be more willing to share your blog with others. When you write an email to a blogger, address them by their name, don't just say 'Hey!' or 'Hey you!'. Or when you leave a comment on a bloggers post, make it personal, be engaged, be you. Don't just write, 'following you from the ________ hop, would like a follow back. Thanks!' or 'Your blog is cute.' and leave it at that. No one is going to read your comment and follow through to your blog. No one is going to read that email and think 'I want to stay connected with this person.' and add your button on their sidebar. You want them to feel connected and you want them to want to read your blog.  Isn't that what you wanted in the first place? To have people read your blog? Now they'll want to be your blogging friend too! Trust me, authenticity and being real when connecting with other bloggers has given me the opportunity to have support in the blogging community as well as making a few amazing blogging friends. All of the contributors have become amazing blog friends, even more than just them. And it really makes blogging that much better.

So if you follow these simple guidelines you'll be sure to have an authentic blog, true to you, with a following that fits you. It is so important to be your own blog and not be a copycat!
Have a blog you'd like to share with us? Leave your blog in the comments below and be sure to follow us so we can come and check you out!

 
Pin It